Monday, December 31, 2007

Happy New Year!

I feel like so much has happened since my last blog entry. I guess I will have a lot to talk about. Pardon me if my post runs on and on!

I recently returned home from spending Christmas with my family. It was wonderful (as usual). I am truly blessed to have the family I do. My holiday was very relaxing, but I suppose it is time to get back to work as well as get back to creating some new cards and projects!

Speaking of new projects, I have two new classes coming up in January, so be sure to look for them. My 10 in 10 Valentines day class is Thursday, Jan 24th from 6:30-8:30, and my Clearly Hero Arts class is Wednesday, Jan 30 from 6:30-8pm. The Hero Arts class will highlight their new 2008 images, but it will also focus on working with clear stamps (how to use them, care for them, etc).

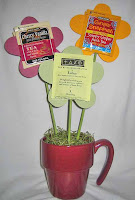
Today I am posting my version of tea "pots" that I gave to some friends for Christmas. I found some cute mugs at a store that reminded me of flower pots. I filled them with the foam that florists use and then covered the top with moss. I then took some bamboo skewers and painted them with ink from my VersaMagic Tea Leaves reinker. I am a big fan of VersaMagic ink because it seems to dry on everything, and the colors are gorgeous. If you have never used this ink on vellum, you should really try it! But, I digress.... I cut flowers from various colors of cardstock and then taped them to the bamboo skewers. For each "flower," I cut two shapes at the same time so that the edges would match. I attached the skewer between the two shapes so that the top of the skewer would be obscured by the cardstock pieces. I then attached two tea bags to each flower (one in the front and one in back). I used one gummy glue dot to attach each tea bag. I didn't want to go crazy with the adhesive because I wanted the tea bags to be easy to remove without tearing the paper wrappers.

What else? Oh! I was tagged by Julie to list 7 interesting things about me. Here goes:
1. I attended 6 elementary schools growing up.
2. I know all of the words to Don McLean's American Pie.
3. I have seen The Nutcracker in both Manila and London.
4. I am the shortest adult on both sides of my family (5' 4").
5. I am a Scrabble geek.
6. I broke my arm trying to climb a tree by jumping off of a pair of stilts. My brother said I couldn't do it. He was right.
7. I recently won tickets to Spamalot by submitting my favorite Spam recipe. (I made it up in my head, but let me know if you want my Spam Stir Fry recipe- I am curious how it tastes.)

Finally, I had a chance to check out the Annie Leibovitz exhibit at the Corcoran Gallery of Art last Sat. It was FANTASTIC! It is only going to run through Jan 13th, so you need to hurry if you want to see it. There is also an Ansel Adams exhibit currently running at the Corcoran, so it is really worth the trip (IMHO).

Sunday, December 23, 2007

Merry Christmas from DC!

Sorry it has been a while since my last post, but I really haven't done much in the way of crafting this month. The few items I have made will be given to people soon, and it seems rather rude to post pictures of their gifts before they open them!

Instead of crafting, I have been trying to get ready for Christmas, and I have been trying to do a few Christmas events to get in the holiday spirit.

Today my friend Chrisi and I drove into DC to see the National Christmas tree as well as the Capitol tree. We also stopped by the National Botanical Gardens to see their lights and mini railroad set-up. I had no idea it existed, but I recommend going to see it if you are in the area! I am including some pictures of our outing. Sorry if Christmas lights aren't your thing.


Today's card is a quick and easy Christmas card. The branch is by Stampendous, the ornament is from Memory Box, and the saying is by Hero Arts. I colored the ornament with Prismacolor pencils and then added some gold and green Spica markers on top of the color pencils. The Spica pens are translucent so I often put down a bottom layer of color and then use the pens on top.

I am leaving tomorrow to be with family for the holidays, but I promise to post some more pictures soon. I have a TON of new Impression Obsession stamps to play with, so watch out for some new IO samples as well.

I wish everyone a Merry Christmas and a new year filled with peace and happiness.

Tuesday, December 11, 2007

Prima Paintables Part 2

I said I would post more of my Prima Paintables samples, so I thought it was about time to actually make good on my promise. I still need to photograph my Twinkling H20 card. Twinks do not scan well at all.

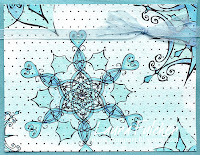
The snowflake card was made using a Twinkling H20 wash on the background. A wash uses very little of the Twinkling H20 paint so there wasn't any sheen or glimmer to the background. However, the color turned out very nice. Once again, I am learning that pale blue does not scan well. I colored in the snowflakes using my Copic markers and then finished with clear rhinestones and a bow. It was a very quick and easy card!

The floral card was colored using watercolor pencils and a blender pen. When you use a blender pen instead of a paintbrush and water, the finished result isn't as "watercolored" as other methods. However, you have a lot more control over where you want the color to go.

Tuesday, December 4, 2007

Wild and Crazy Night

Sometimes living just outside of DC has its perks. Sometimes you have the opportunity to do some really cool things. On Sunday night, some friends and I drove into DC to see the celebrities arrive for the taping of the Kennedy Center Honors. I was amazed that we were allowed to stand in the lobby and watch people enter the building. We were about 20 feet from the door and had no one in front of us so we had a really nice view of the celbs. We had a chance to see all of the honorees (Steve Martin, Diana Ross, Brian Wilson, Martin Scorsese, and Leon Fleisher) as well as Cameron Diaz, Steve Carell, Martin Short, Smokey Robinson, Aretha Franklin, Vanessa Williams, Terrance Howard, Jordin Sparks, Yo-Yo Ma, and Lyle Lovett. Of course, there were also a gaggle of Kennedys and other politicos in attendance. Perhaps the highlight was when Robert De Niro tried to sneak by the photographers next to us. It might of worked if one of my friends hadn't yelled "De Niro!" That got the photographers whipping around! In any case, he walked a couple feet in front of us, turned, and smiled at us. Bliss.
I kept saying to my friends before I went that I really wanted to see Steve Martin. I just love him! I said that if I did see him, I would post a card on my blog in his honor. So, for todays card, I am including a party scene where all the characters have arrows through their heads. If you aren't familiar with Steve Martin's early comedy bits, then this card is probably morbid and very odd. However, I have to admit it amuses me. That is just the sense of humor I have.
Over the years I have collected a large assortment of whimsical characters from Claudia Rose and Rubbermoon. I find that I use them more if I create little scenes where they can all hang out. Because the stamps are whimsical, I never worry about the scale of the images...I just go ahead and put them all together. I then put little things into their hands for further embellishment. Putting items in their hands provides me a chance to use some of my other fun stamps such as balloons, flowers, martinis, presents, etc. I always feel like I get my moneys worth when I use so many stamps in one card!
As for my previous post, for some reason the photos don't enlarge like my other blog photos do. I keep getting a prompt to download them if I want to see a lager version. After many attempts to fix this problem, I have given up. I will post the other Paintables samples soon. Perhaps they will enlarge better.

Saturday, December 1, 2007

Prima Paintables Demo

Today at Angela's Happy Stamper we are having our annual holiday party, and I am really looking forward to it! It is always so much fun to hang out with friends and my stamping "family." There will be food, demos, make-and-takes, and a fantastic stamping supply fundraiser for military families stationed in Germany. If you have a chance, stop on by!

I am in charge of demoing some of the new Prima Paintables papers. I wanted to post some of the samples so that anyone attending the demo will have a visual reference to remind them of what I was teaching. Plus, my mom wanted to see some samples, so....

The first sample was made by using some Copic markers. The Paintables papers are printed watercolor paper sheets. It seemed a waste to make a card that didn't use watercolor of some sort. However, I really liked the way the Copics worked on the paper...very vivid!

The second picture is also made by using the Copic markers. When I finished, I thought there was a lot of blank space around the images. To fill in some of the space, I outlined all of the images with a light blue pen. I forgot that light blue does not scan well, so you can only see the marker in some of the places on my picture. Oops!


The third card was created using watercolor crayons and a waterbrush. I applied the crayons directly to the card and then smoothed the color with the brush. The advantage of working with a waterbrush is that you don't have to keep rewetting a paintbrush with water. Nice! I finished the card by embellishing it with a few faux pearls on the flowers.


The fourth card was made using Tombow markers. I scribbled the markers onto acetate and then

picked up some color with a wet paintbrush. I then painted in the images with various earth tone shades. I cut the piece apart and then taped the pieces to a card. I finished by adding a circle punched saying layered onto a popped up yellow circle.

I really enjoyed working with the Prima Paintables. It is a lot like working with a coloring book. You don't have to think about what kind of ink to use that won't bleed when you color and the watercolor paper allows you to add all kinds of inks, sprays, watercolors, and other mediums. I will post some more samples soon.


Thursday, November 22, 2007

Happy Thanksgiving!

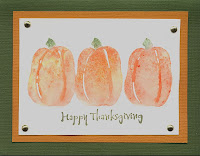
Happy Thanksgiving everyone! The card today was made using a solid pumpkin stamp and watercolor crayons. I damped the stamp with a wet paper towel and then colored it with yellow, orange, and green watercolor crayons. I spritzed it with water and then stamped it onto some heavy cardstock. I repeated the whole process three times and then finished the card with some gold brads. Hope everyone has a wonderful holiday.

Wednesday, November 21, 2007

Procrastination

I am SUPPOSED to be doing a ton of things to get ready for Thanksgiving tomorrow. Am I doing any of them? No. Am I checking out stamping blogs instead? Yes. Sigh. I thought I might as well upload a card to ease some of my guilt.

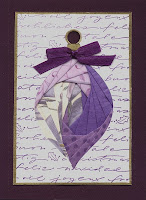
Today's card is an iris folded ornament with bow. I chose a rather nontraditional color palette (purple), but I thought the finished card turned out well. I copied the ornament pattern onto cardstock (a copy machine works well for this). I then used an exacto knife to cut out the ornament pattern. I flipped the card over and stamped a Hero Arts Christmas saying in purple ink. Unfortunately, I think the stamp has since been discontinued. It was important to do the stamping BEFORE I did the iris folding because once you add the folded papers, the card is too bulky to stamp. I also added a piece of gold paper to the top of the ornament and edged the top loop with a gold Krylon pen before doing the actual iris folding. I followed the iris folding pattern and added different patterns of purple paper till the ornament was complete. I have several bits of advice when picking papers for iris folding.
  • Think thin. Thick papers make your card too bulky
  • Add a variety of textures. I often mix up papers such as mulberry papers, vellums, and smooth scrapbook papers
  • Use scraps, but make sure you have enough. Iris folding is a great way to use up some of your small scraps. However, make sure you have enough of each color before you start. I found out the hard way how hard it is to finish a card if you run out of a certain paper. You can never make it look right...trust me!
  • Having trouble picking colors that work well together? Go monochromatic. I picked all purple papers, so I knew they would go with each other.


I finished the card with some gold Krylon pen and a purple bow. I wrote these instructions as if everyone was familiar with iris folding. If you have never done any iris folding, there are a lot of great books out there as well as a wonderful tutorial on Splitcoast Stampers.

I hope everyone has a wonderful holiday! Wish me luck that there won't be TOO much traffic for my drive.

Monday, November 19, 2007

Stamping Friends

As Thanksgiving and Christmas approach, I tend to focus a lot on friends and family. I am truly grateful for all the wonderful people in my life. However, it is also this time of year when I start to miss people the most.
I was going through a box of cards and found one that I had made from a set of Outlines stamps my friend Deedee gave me. Seeing the card made me nostalgic for New Mexico and my stamping buddies Deedee and Michael. It seems so long ago that we stumbled into China Phoenix having no idea what this "stamping" thing was. Little did we know what we were getting ourselves in to!
I also miss the holiday party the three of us would have every year. We would exchange gifts and do some "challenge" stamping. We would each bring some stamps we had never used or didn't know how to use and throw them into a bag. Each person would have to draw several stamps out of the bag and make a card with the stamps they picked. You could either stamp the whole image or use only part of it. Trust me, it was always a challenge, and it was always fun! I still remember the time I drew out a cowboy, a skeleton, and a bathtub. Yikes!
To make the card today, I stamped the tree onto green and purple papers and embossed in gold. I then cut up the pieces of the tree and reassembled them as I wanted. I colored in the patterns with green and purple markers then punched a star out of gold paper. I finished the card with a gold Krylon pen and some gold glitter glue. It is hard to see from the picture but I popped the Christmas Wishes saying up with some glue dots.

Tuesday, November 13, 2007

Sunrise

I was inspired to make some pins by my recent trip to Hampton, VA for a stamp convention. When I went to my first stamp convention back in 96, tons of people traded pins before they went into the show. Ever since then I have packed my bag of trade pins and sought out those who were also trading. Unfortunately, every year since then I have found less and less people who were also trading. Is it a lost venture? I came home this year with only 3 pins. Sigh... Okay, I will stop being melodramatic.

It would have made sense to post the pin that I made this year as a swap. However, I handed them all out to people and told them about pin swaps in the hopes that next year more people would participate. Looking back, it might have been a good idea to take a picture BEFORE I handed them out! I made a mini version of my Impression Obsession bat martini card and added a pinback. Very cute (if I do say so myself).

When I trade pins at a show, I try to create something nice but also something that isn't too expensive or too hard to mass produce. The pin I am including today is not something I would trade at a show. It was easy enough to make, but the glass and frame would have been to costly. To make this pin, I used one of my favorite Rubbermoon stamps and colored it in using Twinkling H20s and a waterbrush....easy! I then placed it between two pieces of glass and surrounded it with a metal frame from Ranger. The frame comes with a loop on the top to make it into a necklace. I clipped off that part and put a pinback on the back so that it could be worn.

Friday, November 9, 2007

Merry Chrismoose!

The weather here in Virginia went from the low 70's to mid 40's so fast this autumn. One day I was wearing sandals and the next I was searching for a jacket and scarf. Sigh. In any case, it started me thinking about Christmas and Christmas cards. Can you believe it is only two weeks till Thanksgiving?

So...for today's card, I decided to post something in honor of Christmas. I love the stamps by My Favorite Things. What fun! I saw this set, and had to have it. I am sure that many of you have had that same problem when seeing new stamps!

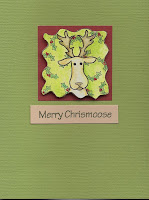
To create the card, I stamped the moose onto 120lb watercolor paper with black Versafine ink. I allowed it to dry and then colored the image with watercolor crayons and pencils (moose with pencils and background with crayons). I colored the entire background (even the holly leaves) with a green watercolor crayon and then smoothed it with a waterbrush. I then went back with markers to color in the holly (over the green crayon). I found it easier to highlight the holly in with darker colors rather than trying to color around each individual holly leaf.

The image of the moose is actually bigger than what I have on my card. I decided to cut it out smaller so that I wouldn't have as much coloring to do. I find that going through my stamps and picturing how I would use just part of an stamp rather than the whole image helps me get the creative juices flowing. It also makes my stamps so much more versatile. My moose stamp has holly around him, but if I were to just cut out the moose, I can use him year-round.

Wednesday, November 7, 2007

Tying Bows (with a template)

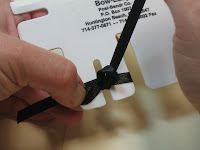
Probably the one thing people ask me to show them over and over again the most is how to tie bows with their Bow Easy. I bought mine at Angela's Happy Stamper and use it in almost all of my classes (My name is Laura, and I am a bow addict!) Tying large bows is relatively easy to do with just your hands. However, if you are trying to tie tiny bows (and have them look nice), a bow maker really helps. The Bow Easy comes with directions, but it really helps to have someone show it to you the first time. After I show people how to use the device, I always tell them to go home and make about 20 bows...that way you will never forget how to do it. However, most people don't make practice bows and forget how to make them. I understand...no one likes homework! I am always willing to show people multiple times, but what if you need to make bows when I am not there? :) I thought it couldn't hurt to post my own instructions as a reference guide. Forgive me for posting so many pictures, but I couldn't seem to cut out any of the steps.


This is the Bow Easy. Oooh...aaahh


Pick two of the plastic prongs to be the size of the loops of your bow. Cut a long piece of ribbon (easier to work with when you are just starting out) and place the ribbon on the Bow Easy so that you leave yourself a tail on the left side (you can sort of see the tail underneath my thumb). Hold the tail down on
the Bow Easy using your left thumb. The rest of the ribbon should trail across the top of the Bow Easy.


Wrap the ribbon around the underside of the Bow Easy and back to the top. Move your thumb so that it now holds the tail and the the ribbon you have wrapped around the two prongs.


Thread the ribbon through the space between the two prongs. DO NOT pull the thread tight. You need to leave yourself a loop for tying the bow.


Pull the ribbon through the space between the prongs leaving yourself a loop.


Thread the end of the ribbon through the loop. **Important..you must go through the loop from the left side to the right side. If your loop is laying
funny so that it is hard to go through the left side, you have to physically move the loop so that you can enter it through the left side. If you feed the loop right to left, it won't knot.


Pull the ribbon through the loop and pull tight to form your knot. Technically, your bow is now tied. However, we are going to add an extra step to help the bow lay flat.


Once again, thread the end of your ribbon through the space between the two prongs.


Tug the ribbon from underneath the Bow Easy (out and away from you). This really does help the finished look of your bow. You can now slide the bow off of the bow maker.


Finished! I know it seems like a lot of work. However, you do get a lot faster with practice. I can whip out bows pretty fast now! I hope this tutorial helped.


Saturday, November 3, 2007

Back Again

I had hoped to return from the Hampton show with tons of new thoughts and ideas. I did. I also returned with a horrible cold. I can't tell you the last time I felt so bad from a simple cold! Anyway, I am finally getting back into the swing of things.
Unfortunately, I had to cancel last Thursday's "10 in 10 class." For some reason, I thought people might object to my hacking and sneezing on the supplies before they used them. I apologize to the students who showed up to the store before they got their message about the canceled class. I rescheduled the class for Tuesday, November 27th from 6:30-8:30pm. I hope people will be able to attend that class instead!
Back to the Hampton show... I had a blast! The show was small, but I felt that many of the vendors had great demos to watch. On Friday night, my mom and I attended a MITI/dessert session. It was so much fun! Humm...stamping and desserts...does it get any better? Everyone received a goody bag just for attending, and about half of the attendees won a door prize. Unfortunately, my mom and I were losers on that front. For my mom's sake, it was probably just as well I didn't win and have to do my obnoxious victory dance.
For the MITI session, we made 4 projects, had dessert, and made 4 more. The projects were taught by the vendors, so it was a great opportunity to talk to them 1 on 1 and hear about their products. The only downside was that one vendor did the same exact project as last year. Boo!
On Saturday, we attended the actual show. The first 100 people that arrived got a key that had a chance to open a chest with a $100 gift certificate inside. Sigh...losers again. On a positive note, my ATC and pin submissions earned me some "spreadin' around" money for the show (insert obnoxious victory dance here).
Favorites of the show... I loved the Paula Best booth. I can't say enough good things about her fun images and gorgeous jewelry. I ended up with a "Be happy" necklace that is just fabulous. I also really enjoyed the Starving Artistamps booth. Their line of "Doodle Factory" images are weird, quirky, and totally me! I grabbed up their Halloween images immediately and had to get a few of their other weird characters. I also had to get one of their quick mosaic stamps. (Notice the use of the phrase "had to." I couldn't help myself...they had a great demo person). Watch for blog samples soon! I learned a lot at the Sticky Scrap booth. The owner used a lot of Art Impressions watercolor stamps for her booth MITI projects. She rotated the projects every hour and a half and charged $1 to make a card. I have to tell you, they were the cheapest (and most informative) mini classes I have ever taken!
Finally, I HAVE to mention the Impression Obsession booth. Now, I might be biased, but the booth looked great! It was so much fun to see the work of my fellow design team members up on display. I feel like I know them and their work from all the back and forth design team postings. I also got to see Mitra briefly and chat about some of the upcoming new images. I can't wait! I was a little jealous of her though. She was wearing her UVa crocs, and now I am going to have to have a pair. Just call me an envious fellow alum.
The card for today is a Halloween card I made during the Fri night MITI. The image is from Sticky Scrap. What impressed me about this card is that I liked it even though it was coated in glitter. I am just not a glitter person. I think it is because it always manages to find its way into my eye and stick to my contact. Painful! Plus, the stuff never goes away. I think I am still finding glitter from things I made in the 3rd grade. Anyway, we used Sticky Scrap's EZ-Tear Double Sided tape which held the glitter pretty darn well. We were also instructed to use the back of a spoon to really smash the glitter into the tape. I hadn't heard this tip before, and I think it made all the difference. After we "whacked" the loose glitter off the card, the remaining glitter seemed pretty permanent. I also liked the tape because it costs about 5 cents a foot. You can't beat that!
Well, this was a long post, but I had to make up for not posting all week.

Friday, October 26, 2007

Quick Note

I am off to Hampton, VA this weekend for the Stamp Scrap Art Tour, and I am very excited! I always love to see what is new and different. I have my ATC and pin ready to enter, and I am hoping to win a gift certificate to spend at the show. Think good thoughts for me! I will post my thoughts and impressions of the show when I get back.
The card for today is made using images from Impression Obsession. The images by Leigh Hannan (one of their designers) often have tiny little details to them. I find that using VersFine ink really helps show off each and every line. The berries are raised dots that I created using red Liquid Pearls. I am quite pleased with how it turned out (even if one of the "la's" didn't fit on the end. :)

Wednesday, October 17, 2007

Sad Crafting News

I don't have a card ready today, but I wanted to blog about the closing of all the Recollections stores. I shop at the Sterling VA store, and I know I am going to miss it! I had heard that they were closing, but you never know what is rumor and what is fact. Well, Michaels made their official announcement about closing the stores today.
I never really bought stamps at Recollections (I work at a stamp store after all), but I loved to look at all their papers and embellishments. They always had a huge selection from so many different companies. Plus, their workspace is ENORMOUS! I feel bad for myself (I hate to take away my shopping opportunities), but mainly I feel sorry for all the employees that gave their heart and soul to creating such a wonderful store. I wish them all the best!

Tuesday, October 9, 2007

Happy Thanksgiving!

Okay, it is a month away, but I am already thinking about Thanksgiving. When you design cards for classes, you tend to think about holidays before anyone else. Don't worry though, I haven't started my Easter cards yet!
Today's card is a rather easy card to make. I used images from Impression Obsession and stamped them onto 90lb watercolor paper using VersaFine Vintage Sepia ink. After the ink dried, I colored in the leaves using Twinkling H2O's and a waterbrush. The border at the bottom was created by stamping the leaf image onto a scrap of watercolor paper, coloring it with the Twinkling H2O's and trimming it down to a narrow strip. I then attached the narrow leaf strip to the card. Very simple, but I liked how it turned out.
On another note, I have a 10 in 10 Christmas class this Saturday. Yes, I am already thinking about Christmas too. I am so excited because my mom will be taking the class! Yes, she is driving 4 hours to take one of my classes. I guess it had better be good!
If anyone is interested in the class, we will be making 10 quick Christmas cards using images from Impression Obsession, My Favorite Things, Hero Arts, Stampington, Memory Box, and more. The only stipulations are that you bring double sided adhesive and you are nice to my mom!

Friday, October 5, 2007

Treat Bags

Sometimes it is fun to take a break and stamp something other than cards. For today's post, I am including some treat bags I made using some of the new clear border sets from Impression Obsession. The paper itself comes from a kit made by the Paper Cut. You could cut and fold your own, but to me it is better to have someone do this part for you. Why do extra work if you don't have to? I also used the 4" x 4" plastic bags from the Paper Cut to hold the candy. Again, you could use larger bags from your household, but then you would have to fold them to be the correct size to fit in the paper frame.
Before I stamped any lines, I folded the paper frame so that I could get a sense of what it would look like when finished. This was important so that I would know which way was "up" on each of the sides. I really didn't want to stamp the words upside down! I then used a light pencil mark to measure 3/8" all the way down the front of the bag. The marks really helped me space my lines somewhat evenly. **great tip- buy yourself a clear grid ruler. You will love it! Instead of measuring 3/8" on a standard ruler, I just moved my clear ruler over "three squares." I can't tell you how easy and fast it is to use these rulers!
For the Halloween bag, I stamped images from IO's Fall/Winter borders set. The pumpkin border was inked with Colorbox Pigment orange and the words in VersaFine black.
For the Christmas bag, I stamped images from IO's Christmas borders set. The words were stamped with VersaFine Crimson Red and the trees were stamped with Memories green. For both of my bags, I stamped the words with VersaFine so that all the tiny details of the lettering would be noticeable.
As an extra embellishment for the Christmas bag, I included a shrink plastic charm made from the peppermint image in the Leigh Hannan Holidays set. To make the embellishment, I stamped it with Satin Red Versafine onto ultra thin white shrink plastic. I used the Satin Red color because colors darken as they shrink, and the Crimson Red would have been too dark. I also picked the ultra thin shrink plastic so that I wouldn't have to sand the plastic before I stamped on it.
General tips for stamping on shrink plastic....normally I use Staz on when stamping onto plastic. However, it is not a good idea to use Staz On with clear stamps. Staz On is just too rough for the clear polymer and is almost impossible to get off of the stamp. Instead, I used VersaFine ink. It was more prone to sliding when stamping onto the shrink plastic, but it did dry when heated (I had my doubts). Also, make sure you punch a hole in the plastic BEFORE you shrink it!
General tips for the candy... don't fill the candy bags too full. I put too much candy corn in the Halloween bag, and it bulges a bit. Also, I unwrapped the peppermints before putting them in the plastic bag so that they would photograph better. This is a BAD idea if you want to give the candy to someone. My peppermints have stuck together to form a solid peppermint chunk.....very bad for eating but heavy enough to possibly be used as a weapon.

Sunday, September 30, 2007

Love the Pears

I posted a pear card a couple of days ago, and it prompted me to post another one. I don't know what it is about pears, but I sure do love to stamp them!
One of the great things about working with pear stamps is that you can really play around with the colors. It is okay to stamp them in greens, golds, burgundys, etc... For my card today, the pear turned out kind of pink!
For today's card, I stamped a pear word background (A Stamp in the Hand) onto cream cardstock and embossed it in gold.
To create the pear, I colored the stamp (again, A Stamp in the Hand) with watercolor crayons, spritzed it and stamped it onto white cardstock. The beauty of watercolor crayons and a solid stamp is that you never know the result you are going to get. This card's pear looks kind of "splotchy." Sometimes the watercolor looks smoother.
I stamped a striped background (Hampton Art) with the same process- watercolor crayons colored directly onto the stamp, spritzed and stamped onto white cardstock. I wanted the lines to be somewhat well-defined, so I didn't use as much water as I did with the pear.
I then layered all of the pieces and included a piece of white mulberry paper that I had spritzed with a gold glimmer mist. You can't tell from the picture, but the mulberry has a "shimmer" to it.
Oh! One last tip when working with watercolor crayons on a stamp- be sure that the stamp is SLIGHTLY wet when you apply the crayon to the image. You will find it so much easier to color the stamp! I like to wipe the stamp with a damp paper towel...that way you don't get too much water onto the stamp.

Monday, September 24, 2007

Excited!

I don't normally blog this frequently, but I just checked out Dave Brethauer's blog and saw that he posted my jack o'lantern card from my upcoming 10 in 10 card class on his site! I am so excited that he liked it! I am sure the fact that it uses one of his new stamp sets has nothing to do with it. :)
I have two upcoming classes this week, so there is much to do. "Fall for Impression Obsession" is on Wednesday and uses their new line of fall images. The cards in the class are the same ones I created as an IO design team member. 10 in 10 Fall is Sunday and has 3 Halloween, 3 Thanksgiving and 4 quick generic fall cards. It never hurts to have a stash of cards on hand!
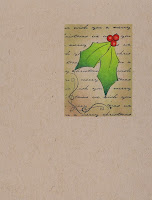
I was planning on posting my pumpkin card that appeared on Dave's blog but just realized that I haven't scanned it yet and my only copy is at Angela's. So....plan B. It seems odd that Dave has a picture of my card, and I don't! Instead, I am posting a card from the class I took last Saturday. The card was designed to have us practice our Prismacolor blending techniques. The holly leaves were made using three shades of green that were blended together. I worked hard to try and get the color grade to transition smoothly. I still need to practice!

Busy, busy weekend

I have to say, I had a FABULOUS weekend! How did I know it was going to be a good weekend? It started out with me driving behind what I would call a "bubble car." It had painted bubbles all over it, and when it turned a corner, bubbles shot out of the back. It doesn't get better than that! I also knew it was going to be a great weekend because Dave Brethauer, owner of Memory Box, was teaching at the stamp store where I work. Guest artists always make for a busy weekend, but it was definitely worth it.
For those of you who know me, you know that I love to color with color pencils as well as paint with watercolors. Most of what I learned was from Dave's first book called Stamp in Color. That book is out of print, but his new book is out and called Card Design. It has wonderful samples in it and really helps you get a grasp on coloring images.
**On a side note to my family who read my blog, Dave is from Wray, CO and therefore knows about Akron and Otis. I think he is the first person I have EVER met who knew where our family is from (and that includes all the people I have met who were born and raised in Colorado). We even had a conversation about the Norka! It really is a small world. Okay, back to the crafting...
Although Dave taught both a color pencil and watercolor class, I took a combined class along with the other staff members at Angela's Happy Stamper. It was so incredibly generous of Angela to pay for us to have a private class. She is such a great boss!
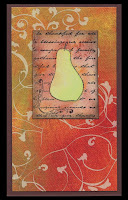
The first card I am including is a card we made in the class using watercolor pencils and a paintbrush. We scribbled color here and there around the pear and then blended with a paintbrush and water. We worked from light to dark colors (can't take away any extra watercolor paint) and moved the brush from top to bottom using a "wiggle" motion. I know I am not giving the technique justice. I guess that is what his book is for!
The second card is a card I made Dave as a thank you. It used some of techniques we learned using Prismacolor pencils. I don't use gamisol with my Prismacolors because I think it dulls the color and it sometimes eats my paper. I do however use a blending pencil to crush pencil colors together. In Dave's class, we didn't use either the gamisol or the blending pencil. Instead, we learned to work with just the Prismacolors themselves to achieve the final look. I really like the effect. I finished the card off with matching rhinestones, but it is hard to tell what the centers of the flowers are from my scan.
This blog entry ended up to be rather long. I guess you can tell that I had a wonderful weekend and had to ramble on about it for a bit. Sorry!

Thursday, September 20, 2007

The calls have begun

The good news is that I have received a lot of calls from friends lately. The bad news is that they were all calling me to update my blog. Where is the love? :) I told my mom that story and she said, "I guess it's good I didn't call you asking that." Apparently she had the same intentions.
I have been so busy getting some classes together that I haven't done much blogging. I have a couple of "10 in 10" classes coming up, so I will be sure to post some samples.
Today's card is one of the cards from my "10 in 10 fall." The tree elements are from a clear set made by Memory Box and the saying is by Impression Obsession. What makes this a quick card is that there is no coloring involved. I often get so involved in planning how I am going to color objects that I forget that you can simply "ink and stamp." Sometimes it is best to stick to the basics!
I chose to post this card because Dave Brethauer of Memory Box will be at Angela's this weekend!!!! I can't begin to explain how excited I am. I love his coloring techniques and can't wait to learn from the master. I promise to post a report on his classes.

Wednesday, September 5, 2007

Creative Carving

I feel like a bad blogger, but I had Labor Day weekend to enjoy and car problems to deal with first. My mom says that I have "bad car karma." I am beginning to agree with her. I swear it felt like my car was possessed yesterday. The door lock mechanism went crazy, and I had to listen to "click, click, click, click, click...." as the doors continually tried to lock and unlock themselves. I heard clicking as I drove, and I heard clicking even when I turned off the car! Has anyone ever heard of such a thing? Anyway, I had time tonight (after my enjoyable ride home sans clicking) to work with a stamp that I carved myself
Carving stamps is a weird thing for me. On the one hand, I LOVE having something that I made myself. On the other hand, I find the process of actually making the stamp tedious and stressful. My friend Michael claims that carving is very relaxing, but she is clearly insane.
To carve my own stamps, I buy the pink carving blocks at Michaels (carving materials are located in the art section next to the calligraphy supplies). There is a white block available that is cheaper, but I find that the white blocks crumble too much. If you do a lot of detailed carvings, you might want to get higher end carving blocks that allow for better shallow cuts, but for me, the stuff at Michaels works fine.
For my image, I either draw or modify clip art onto a piece of paper. Technically, you don't have to alter clip art to use it (no copyright), but I find most clip art needs to be simplified so that it won't be as hard to carve. I trace the image with a pencil and then place the image on top of the carving block (lead side down). I rub over the back of the paper so that the lead is transfered to the carving block. **Remember to reverse your image if you are carving letters** I then begin the process of carving around my lines. Some people like to leave a lot of stray carving marks in their piece so that it has that "carved" look. I tend to work hard to remove those lines.
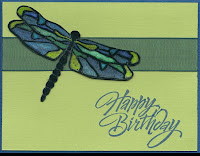
For my dragonfly card, I embossed my image with clear EP and then colored it with Twinkling H2O's. If you click on the dragonfly picture, it will enlarge so that you can actually see the shimmer of the watercolor paints. It was a lot of work, but I love saying I made the dragonfly myself!
Ps...the saying is by Hero Arts. I'm crazy, but not crazy enough to carve that.

Tuesday, August 28, 2007

Loving the Memory Box

I was working tonight and restocking the shelves at Angela's with the latest Memory Box stamps. I've said it before, and I'll say it again...I sure do love their stuff! It is so dangerous entering the stamps into inventory and not saying, "one for the customers, one for me. One for the customers, two for me." I am really looking forward to Dave Brethauer's (owner of Memory Box) visit to the store in September.
The card today uses Memory Box stamps and paper. Although, I am not sure that they make the paper anymore. It was a really simple design, but it took me quite a bit of time to stamp all the little fish. It started with a couple fish and then built and built and built. Sometimes it is so hard to stop when stamping!

Monday, August 20, 2007

Precious Metal Clay

I have been wanting to take a class in precious metal clay (PMC) for a long time and finally had a chance over the weekend. Barbara McGuire was a guest instructor at Angela's Happy Stamper and taught two PMC classes. I could only afford to take one, but I am so happy I did! I enjoyed the class very much, and it was so great (and dangerous) to see a whole new way to use my stamps.
PMC is real silver with a binding agent so you can mold it as you would any other clay. You can then stamp into it and cut out shapes to make any sort of jewelry you want. When you fire it in a kiln, the binding agent burns off and you are left with a hardened piece that is real silver. (This is why it is such an expensive medium to choose). Of course, now I want a kiln, clay tools, liver of sulphur, a rock tumbler..... sigh!
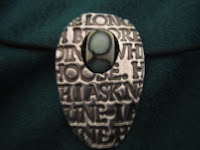
I tried to take a close up of my necklace, so it is hard to judge the final size. The finished piece is about 7/8" x 1 3/8." I designed the center oval to fit a specific handmade bead, but I don't think it will be hard to find other beads that will fit. This type of jewelry is perfect for me because I love beads, but I am not a beader. This way I can buy a bead that I like and "highlight" it with the silver. Fun!

Sunday, August 12, 2007

Happy Anniversary Angela

Yesterday was a big day at Angela's Happy Stamper. It celebrated the fourth year the store has been open. It seems as though in this day and age, it is hard for the small business owner to survive. There are large chain stores to compete with as well as the Internet. I know that for many of us, Angela's provides a sense of community (as well as feeds our stamping addiction). Personally, I consider it a blessing to have been part of the store since the beginning.
The party at the store was so much fun (as always). So many familiar faces as well as the occasional "first timer." It always amuses me when someone comes to the store for the first time during a big event. I always wonder if the new customers think the parking lot is always full and there is always a lavish food buffet. :)
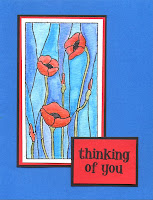
The card today is one I made for the anniversary celebration. We tried to make a lot of new samples to highlight 3 new companies to the store. The poppies are made by Sparkle and Sprinkle, which is a company that has an eclectic assortment of images ranging from cute to elegant. The saying is from one of my favorite clear sets made by Impression Obsession. I colored the poppies and background using Twinkling H20's. As always when I scan a "metallic" card, the sparkle doesn't show up. Trust me though, it is there! I love the dimension that these paints give to my cards. For anyone interested, I have an upcoming class teaching people how to work with Twinks.
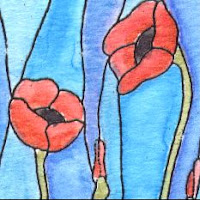
I am including a close up of the poppies to make a point about using watercolors. If you have the time, it is always a good idea to let areas you have colored dry before you watercolor next to them. In this case, the red poppies and blue background were both wet and started to bleed into each other. I was going for speed rather than allowing for drying time, so I didn't get crisp edges between the flowers and the stained glass that I would have liked.

Tuesday, August 7, 2007

Weekend of art, hon

This was such a busy weekend for me! I was so lucky to have my mom visit so that we could celebrate her 60th birthday together. As always, we had so much we wanted to see and do while we were together. And as always, we had so much fun!
For her birthday, mom wanted to drive up to Baltimore to see a quilt exhibit celebrating the women of Gee's Bend Alabama. The quilts are phenomenal and are even more amazing when you realize that the women were/are able to create such works of art from found scraps and pieces of old clothing. If you are interested in quilting, check out the NPR radio broadcast about the Gee's Bend quilts. Those women are amazing!
To continue our fun "artsy" weekend, we went to a bohemian/kitschy area of Baltimore known as "the Avenue." It is loaded with fun galleries, shops, and diners. We had to have lunch at Cafe Hon and have been saying, "hey, hon" and "how ya doin', hon" ever since. I had to include a picture in today's blog of a sign I saw on one of the stores. It still makes me smile.
Now, back to my crafting.... for today's card, I stamped the vine border (Impression Obsession) on the top and bottom of the page and used scissors to cut around the leaves. For places that were harder to cut, I actually cut a little further out and then used a watercolor pencil to hide the fact that I didn't cut right up to the line. I then used a "kissing technique" to stamp the butterfly. (Sounds kinkier than it is). I inked a solid butterfly with yellow pigment ink and then inked the same vine stamp with green pigment ink. Then I "kissed" the green vine to the yellow butterfly to transfer the green ink to the butterfly. Then I stamped the new patterned butterfly to my card. This is why I love solid stamps so much...you can put any design on them that you want. You could vary this technique a bit by twisting the two stamps slightly when you touch them together so that you get a blurred pattern. Also, instead of using a second stamp, you can place a patterned brass stencil over the solid stamp and sponge color through the holes. Solid stamps are so versatile, hon!

Monday, July 30, 2007

Trial and Error

Sometimes I look at a stamp and have a certain image in my head of what I want it to look like stamped. Sometimes I get that look on the first try (rarely), and sometimes I have to play around with it a bit. The poinsettia stamp from Impression Obsession was one of those stamps. I LOVE solid stamps because they are so versatile, but sometimes they require a bit of trial and error to get them just right. For this stamp, I tried coloring the inner leaves with a lighter color of watercolor crayon and darker colors on the outside leaves. However, when I stamped the image, the colors blended together. Therefore, I had to try stamping it a different way. For my second attempt, I colored the stamp with watercolor crayons and then stamped it onto scratch paper. I then added more crayon and some Twinkling H2Os to the bottom leaves, spritzed the stamp with some water and stamped it onto my card. This time I loved the results! For this stamp, it seemed to work best when the inner leaves had less "ink" on them the bottom leaves. Sometimes, it just takes a little trial and error.

Tuesday, July 24, 2007

New Things Coming

It seems like I just started on the design team for Impression Obsession, but it is already time for a new "challenge" to be sent to me! (Insert happy new stamp dance here). The design team section will be on the IO webpage soon, so be sure to check out what everyone has created. In the meantime, I will get to play with some of their new clear sets. What fun!
For the card today, I once again used the faux batik technique. I stamped the leaves (don't remember the company) onto mulberry paper and embossed with clear powder. I spritzed the paper with various Colorwash sprays and then ironed the piece to remove the embossing powder. I then placed the mulberry over fall script text paper so that it would show through the leaves. You may have to click on the picture for a better view of the font that shows through. I finished by stamping a "splotch" stamp (Just for Fun) over the top with gold ink. Trust me, this is one of the best stamps for finishing a card!